Setting up Mobile SSO for WSO Access [1/3] - iOS
- airwatchhk

- Dec 12, 2021
- 4 min read
Updated: Feb 17, 2025
User authentication, device compliance checking, conditional access and application authorisation are part of zero trust based Anywhere Workspace. Mobile SSO can help to achieve them all together. Mobile SSO is profile based. Administrator can control when to apply to a device and when to get it revoked. For example, when a device is detected as non-compliant, a profile removal is triggered.
From a user perspective, mobile SSO provides a seamless user experience when it comes to user ID + device authentication. User does not need to key in his credential with an Mobile SSO enabled device.
If you have not had mobile SSO set up for a while, you probably still got an impression that it is a difficult task. Thank you VMware, enhancements had been made. Mobile SSO, Hub service and Access integration are all now wizard driven. You can now get Mobile SSO and Access integration completed by just a few clicks. It has never been that easy before.
To start with, please first make sure WSO UEM + Access integration has been done. If it has not been done yet, all you need to do is to provide Access URL/Admin Username/credential.

Before Access integration, please make sure you have logged in to Access and accept the “terms and conditions”. Otherwise, UEM is not allowed to get connected to your Access.

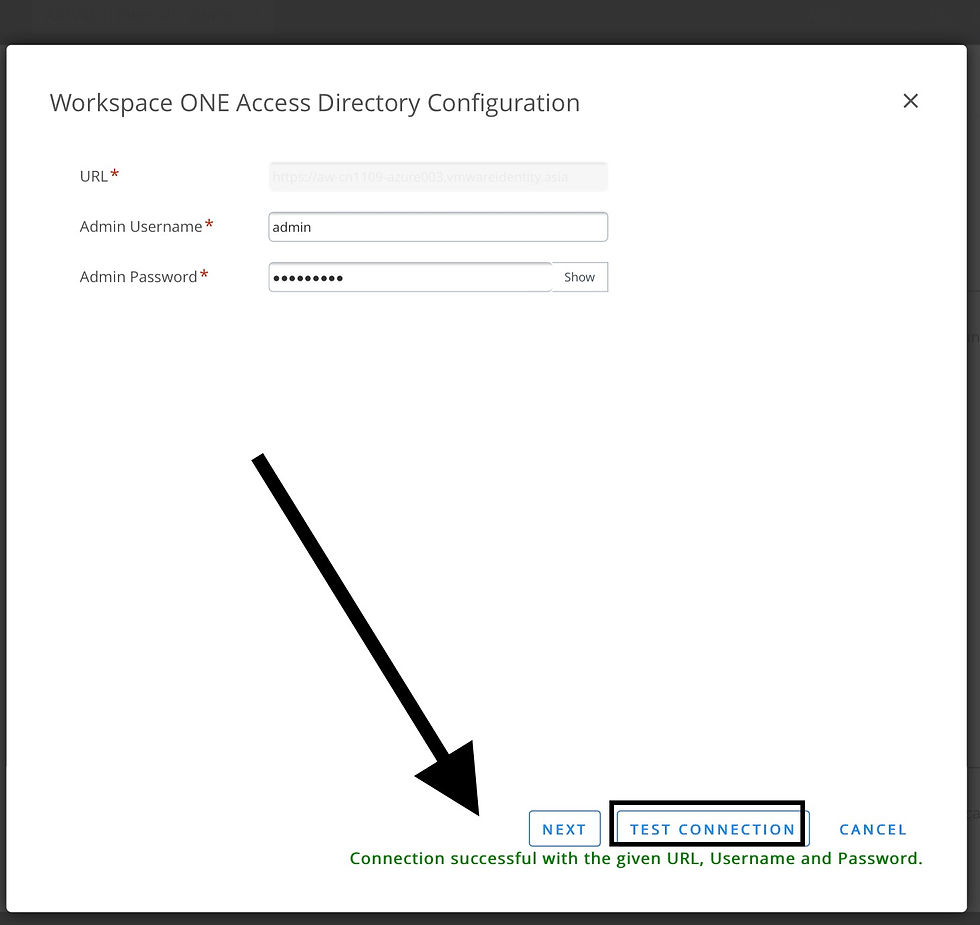
Use your Access URL and admin credential to do a testing connection. If it passes, do a save. This is all you need to do.

Once the Access integration is done, you can check the Access side for UEM integration information. All details are populated automatically for you.

With Access integration completed, we are ready to get Mobile SSO configured. As I mentioned before, getting Mobile SSO configured is now wizard driven. You can find “Mobile SSO” setup from your “Getting Started” section.
If you don‘t see the “Getting Started” option on your UEM side menu, please check if “Settings”->”All Settings” -> “Getting Started” is enabled.

you can now kick start the Mobile SSO configuration.

Follow the ”Mobile SSO” Wizard to get “Mobile SSO“ setup.

All you need to do is to click through all the screens.


A check list will be presented when the wizard is done.


Three new profiles are generated for you to use on iOS, Android and Windows10/MacOS.
This post is focus on iOS but similar steps apply to the three other platforms.

Open the system generated iOS SSO profile and check the “Realm” field. Cross check it against the ”Realm” from Access console. In my case, the “Realm” was not populated correctly in my profile. I had to change it manually to the right value: ”VMWAREIDENTITY.ASIA”.

To cross check a right “Realm” value, On Access console, go to “Mobile SSO (for iOS)” under “Authentication Methods”, make sure “Mobile SSO (for iOS)” is enabled.
Click the pencil icon to open the policy.

You should use the same “Realm” value from Access on UEM. Make sure the profile generated on UEM side match the value from Access.

While you are still on Access console, go to Built-in “identity Providers”, you will see ”Mobile SSO (for Android)”, “Mobile SSO (for iOS)” and “Certificate (cloud deployment)”. The “Certificate (cloud deployment)” is for Windows 10 and MacOS mobile SSO.

In the “Built-in” Identity Provider, make sure “ALL RANGES” in “Network” section is checked to allow the “Built-in” Identity Provider to take all incoming requests from any IP address. Network range can be used to define IP address based conditional access.

Jump back to UEM side. On the UEM console, open up the system generated iOS SSO profile and give it an assignment.

Make ”Assignment Type” = “Optional”. This allows user to add or remove the profile from user self service portal without console access. We can see authentication flow difference with and without a Mobile SSO profile. With this setup, you can do everything including Access login and profile control from your iPhone. It is particularly handy when it comes to a live demo. All you need is a iPhone with internet connectivity.

The next setup is user accounts management. To keep this simple, I chose to get UEM user accounts synchronized to Access.
On UEM console, enable “Basic User Sync” in WSO Access section.
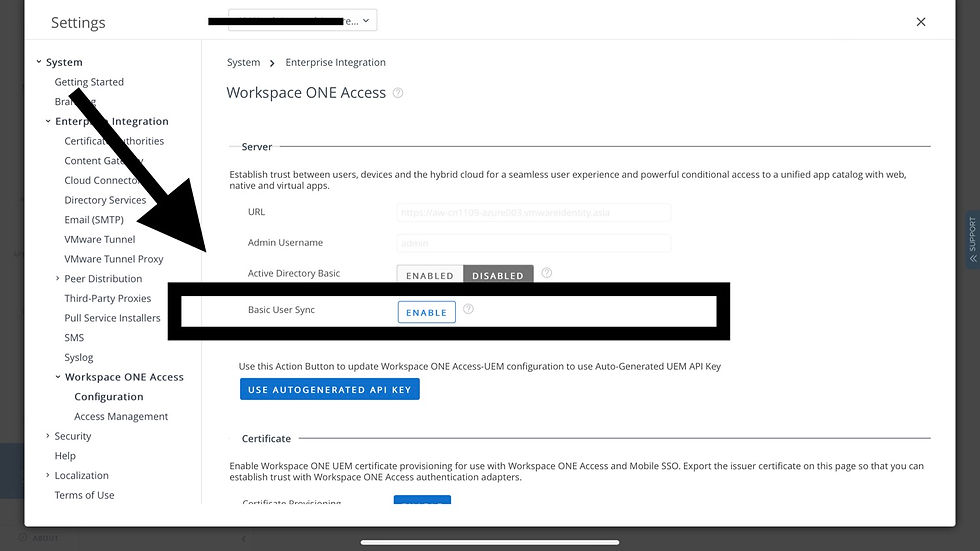
Perform a network connection test before clicking “Next”.
Take the default and save!

An initial synchronization is triggered after you have the change saved.

You should see your UEM users synchronized successfully to your Access console. You can tell it by a different domain/directory name.

Go to “Authentication Methods” -> “Password (with Workspace ONE UEM”) and make sure it is enabled. This simply allows UEM user to login to Access.

Go to ”Setup” -> “VMware Workspace ONE UEM” and get “User Password Authentication through Workspace ONE UEM” enabled.
Please note that no UEM user credential is synchronized and UEM user authentication request is passed through to UEM.

Go to “Preferences” , make sure “Change different domain” is not hidden from user login page. With this setting, both UEM users and Access users are allowed to login. Users can choose which domain he likes to login in cases he has multiple domain accounts.

Now go to the “Built-in Identity provider” and make sure “Password (for Workspace ONE UEM)” is checked just like “Mobile SSO (for iOS)”.

To showcase conditional access, let’s add Verify 2FA as a fallback in case “Mobile SSO“ is not set.
Goto “Authentication Methods” -> Get “Verify“ enabled

Associate “VMware Verify” in “Built-in” Identity Provider like we did it for other methods in previous step.

Modify the existing iOS policy to define our new conditional access rules.


1. UEM user can use either Mobile SSO.
2. UEM user can use UEM credential + Verify 2FA to login if Mobile SSO is not configured on his device.
3. While local user can use local username and credential to login.

Go back to UEM, add one weblink to user self service portal, one weblink to Access and WSO Verify app.

We are now all set. Enroll your iPhone or iPad and play with it. This is a iPhone demo video.
The iPhone started without a “Mobile SSO” profile. 2FA is setup as a fallback authentication method so the user was authenticated with UEM basic user credential + Verify.
Device was then authenticated via “Mobile SSO” after the profile was pushed from user self service portal.
Profile was removed again and this time user logged in as local admin with local user credential.
Reference:
![Setting up Mobile SSO for WSO Access [3/3] - Windows 10](https://static.wixstatic.com/media/798605_edc748606add452c849ef0b03eb6315b~mv2.png/v1/fill/w_728,h_410,al_c,q_85,enc_avif,quality_auto/798605_edc748606add452c849ef0b03eb6315b~mv2.png)
![Setting up Mobile SSO for WSO Access [2/3] - Android](https://static.wixstatic.com/media/798605_fc2129ce4ed14c69877315aa588220bb~mv2.jpg/v1/fill/w_980,h_653,al_c,q_85,usm_0.66_1.00_0.01,enc_avif,quality_auto/798605_fc2129ce4ed14c69877315aa588220bb~mv2.jpg)
Comments